At the same time as I was working on the main hall walls I was also doing the parlor walls.
I covered up the funky mauve Magnolia wallpaper with 1/4" sheetrock and installed the mantle.
The mantle is from a Greek Revival cottage in Griffin that burned in 1915. Another house was built in it's place and some of the mantles and doors were salvaged and used in the new house.
Showing posts with label Plaster/Sheetrock. Show all posts
Wednesday, June 10, 2015
Tuesday, June 9, 2015
Main Hall walls & ceiling
Next I turned my attention to the main hall walls and ceiling. First I completed all the electrical and plumbing. Then I had to cut out areas of bad plaster on the ceiling.
Then I hung the sheetrock.
I had to make a decision on what to do with the stairs. I eventually want to replace them with a period correct staircase from the 1850's. In the meantime I cut the wall down to follow the angle of the stairs and framed in the area above where the drop ceiling was.
Then I primered the walls.
Then I hung the sheetrock.
I had to make a decision on what to do with the stairs. I eventually want to replace them with a period correct staircase from the 1850's. In the meantime I cut the wall down to follow the angle of the stairs and framed in the area above where the drop ceiling was.
Next I taped and mudded the walls and ceiling.
Then I primered the walls.
Sunday, May 10, 2015
Plumbing & Boarding up the Window
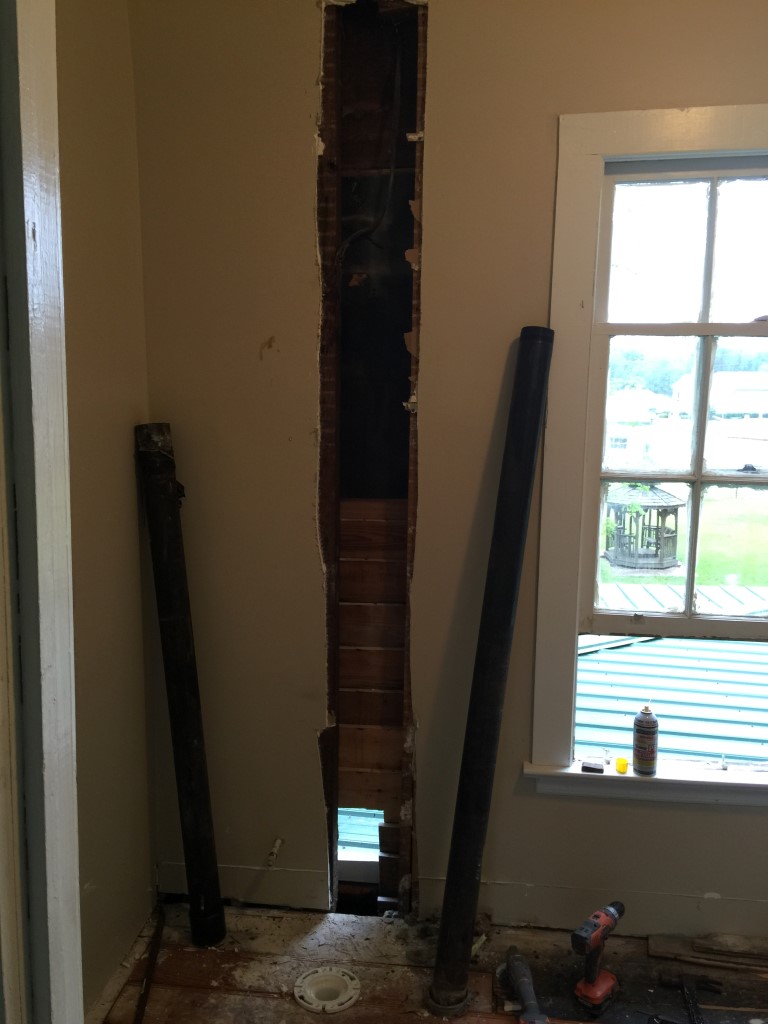
With the plumbing wall removed I was able to take down the old cast iron plumbing. I had to pull up the linoleum and some floor boards in the upstairs bathroom to access everything easily.
I also had to cut away some of the sheetrock in the wall to get the vent pipe out.
With all the old plumbing removed I was able to install new PVC.
With the plumbing done I went ahead and put up scrap 1x6's to shim out the upper walls in the Foyer just like I did in the Parlor.
I also boarded up the window opening with the 1950's paneling turned backwards.
It matches pretty well.I will sand the edges smooth and caulk before I paint. It should blend in pretty well.
I also had to cut away some of the sheetrock in the wall to get the vent pipe out.
With all the old plumbing removed I was able to install new PVC.
With the plumbing done I went ahead and put up scrap 1x6's to shim out the upper walls in the Foyer just like I did in the Parlor.
I also boarded up the window opening with the 1950's paneling turned backwards.
It matches pretty well.I will sand the edges smooth and caulk before I paint. It should blend in pretty well.
Saturday, April 25, 2015
Sunroom Plumbing wall removal
The sunroom was originally a wrap-around porch that wrapped around from the front of the house. It was built sometime in the 1940's. There is a bathroom directly above the Foyer and the plumbing ran down the sunroom wall, It appears that the plumbing wall was built sometime in the 50's.
The wall is about 1' deep.
I made an interesting discovery when removing the wall.
There was a window here before.I wasn't expecting this because the stairs are on the other side of the wall.
Another interesting discovery is the stud in the wall, you can clearly see the saw marks on it.
Saw marks in a V shaped pattern like this are indicative of being cut with a hand operated pit-saw. Another interesting discovery is the "shoulders" in the window trim. You can see the notch in the siding where the trim jutted out further at the top than everywhere else. This is a Greek Revival characteristic that went out of fashion right around the mid 1860's. These two things almost surely date the house to the earlier of my two possible dates, 1859.
As you can see the doorway was originally a window also.
The wall is about 1' deep.
I made an interesting discovery when removing the wall.
There was a window here before.I wasn't expecting this because the stairs are on the other side of the wall.
Another interesting discovery is the stud in the wall, you can clearly see the saw marks on it.
Saw marks in a V shaped pattern like this are indicative of being cut with a hand operated pit-saw. Another interesting discovery is the "shoulders" in the window trim. You can see the notch in the siding where the trim jutted out further at the top than everywhere else. This is a Greek Revival characteristic that went out of fashion right around the mid 1860's. These two things almost surely date the house to the earlier of my two possible dates, 1859.
As you can see the doorway was originally a window also.
Monday, April 20, 2015
Parlor Ceiling and walls
The drop ceiling in the Parlor came down next.
The original plaster ceiling is in good shape!
The upper walls however had to come down.
I used some of the old 1x6's to shim out the upper wall to get the correct depth for the sheetrock.
Then I put up the sheetrock.
The original plaster ceiling is in good shape!
The upper walls however had to come down.
I used some of the old 1x6's to shim out the upper wall to get the correct depth for the sheetrock.
Then I put up the sheetrock.
Saturday, April 18, 2015
Parlor Doorway Widening
I went back and forth on whether to widen the Parlor doorway. In the end I decided to do it because there are several other doorways that have been widened to 6'.
I'm really glad that I decided to do this because one of the main studs was almost completely turned to power by termites. It's no longer an active infestation but the damage has been done.
I cut the opening for the new entryway.
I checked the studs and found that even though they are load bearing there was no weight on them, so I cut them to height.
I then built a header beam out of some of the old 2x8's and 1x6's cut to fit. I also used the good main stud that I cut out in the place of the one that was damaged.
It makes a huge difference! I love the openness.
I'm really glad that I decided to do this because one of the main studs was almost completely turned to power by termites. It's no longer an active infestation but the damage has been done.
I cut the opening for the new entryway.
I checked the studs and found that even though they are load bearing there was no weight on them, so I cut them to height.
I then built a header beam out of some of the old 2x8's and 1x6's cut to fit. I also used the good main stud that I cut out in the place of the one that was damaged.
It makes a huge difference! I love the openness.
Subscribe to:
Posts (Atom)